Showing posts with label Virgin and Lost Shore. Show all posts

Monday, August 11, 2025

Carving and Cobblestone for Lost Shore Harbor

Progress on Lost Shore is slow at the moment, mainly because I've been gluing down cobblestones in the extensive wharf area (there are a lot of these stones, which makes good mindless work). 

I also started carving the rock outcroppings for the point, what I'm going to call "seal rock", mainly because I already have the Miniprints seals to position there. No magic here, just using Dave Meeks rock carving methods.


I've also been working next to the revetment next to the wharf, cutting and glueing stones along what will look like a causeway to seal rock. All of this needs paint, and I'm motivated by the idea of getting to painting, which is my favorite part. 


Sunday, July 27, 2025

Lost Shore Operating Switch Stands

 I've put a linkage below each turnout to turn a target 90 degrees when the turnout is thrown--this was fussy, but hopefully worth it. I've been making the switch stands by modifying Wiseman Model Services cast white metal stands. Mainly, I'm putting a brass sleeve in the base, and fabricating new targets from punched brass discs. A 3d printed handle completes it.


This photo shows the parts included in the kit compared to my fabricated part. The kit parts are just not stiff enough to operate well or last very long. The kit still makes an excellent starting point. 

I'll paint and install these once the groundwork on the layout is painted so I don't knock them around too much.

Saturday, July 26, 2025

Current State of the Lost Shore Lines

It's been a while, mainly because I have stopped posting on social media and the internet in general. I just got tired of always taking photos, and I found it slowed me down. These photos show the two portable modules I've been working on, they are 22"x60" and represent the terminus of my Virgin and Lost Shore Railroad at Lost Shore. This entirely fictional railroad is set in 1919 on the coast somewhere between Rhode Island and Maine. It incorporates a lot of my past O Scale structures, and will include the water tower. Here are a couple of overview shots. There is a passing siding, a platform, and a couple of spurs.


The photos above show the first section of water after oil painting. I'm giving it a good long time to cure before doing work with gloss medium and gel medium on top. The following sections show more of an overview to get a sense of where things are.

The basic operating scheme is that trains arrive from a cassette (movable staging) and drop passengers and switch out freight before departing. I've set things up so that cassettes can be double ended. This way the departing train can be used as an arriving train easily.

This represents about half a year of progress. Wiring and track is largely complete, but things have slowed down as I create the paving and other ground work. I need to do some painting....everywhere, and it all seem connected, so I'm working accross both modules and gradually getting it up to snuff.
The harbor bottom and platform are removable, and do a lot to cover the joint between modules. This will also let me change out the harbor, having a ship in port or not, for instance, by swapping out the insert. It slides in a track under the "stone" wall. The platform hides the main wiring junction. Each module has a series of PC ties that all feeders are tied to, there are modular plugs between modules. The modules are sized so I can fit them both in our car with one back seat up, this way If I take them somewhere my son or daughter can come with me.

Saturday, January 30, 2016

Layout and bench

Another retro-post from early 2016.


The bench work went in without a hitch.  There was some minor shimming to do, but I'm glad planning went well.  The bench work was prefabricated in Utah, far from where I am currently.  I am glad I got the dimensions right enough that all went to plan.


The reverse angle shows the leaf in upright position, allowing more light on the work bench and access to the window.  I should point out now that the main portion of the room is 7'x9'.  I'm working in a space and a format that might be more familiar to a modeler in the UK.

Tuesday, January 12, 2016

A new start for the Virgin and Lost Shore

I won't apologize for being away, as most people understand that hobbies can come in fits and starts. Part of the randomness of "Random Railroad" is simply that things have a way of changing.  I'm finally catching up with the blog.  Although dated June, this and the next several posts re-cap the time elapsed since January (Written June 2016).

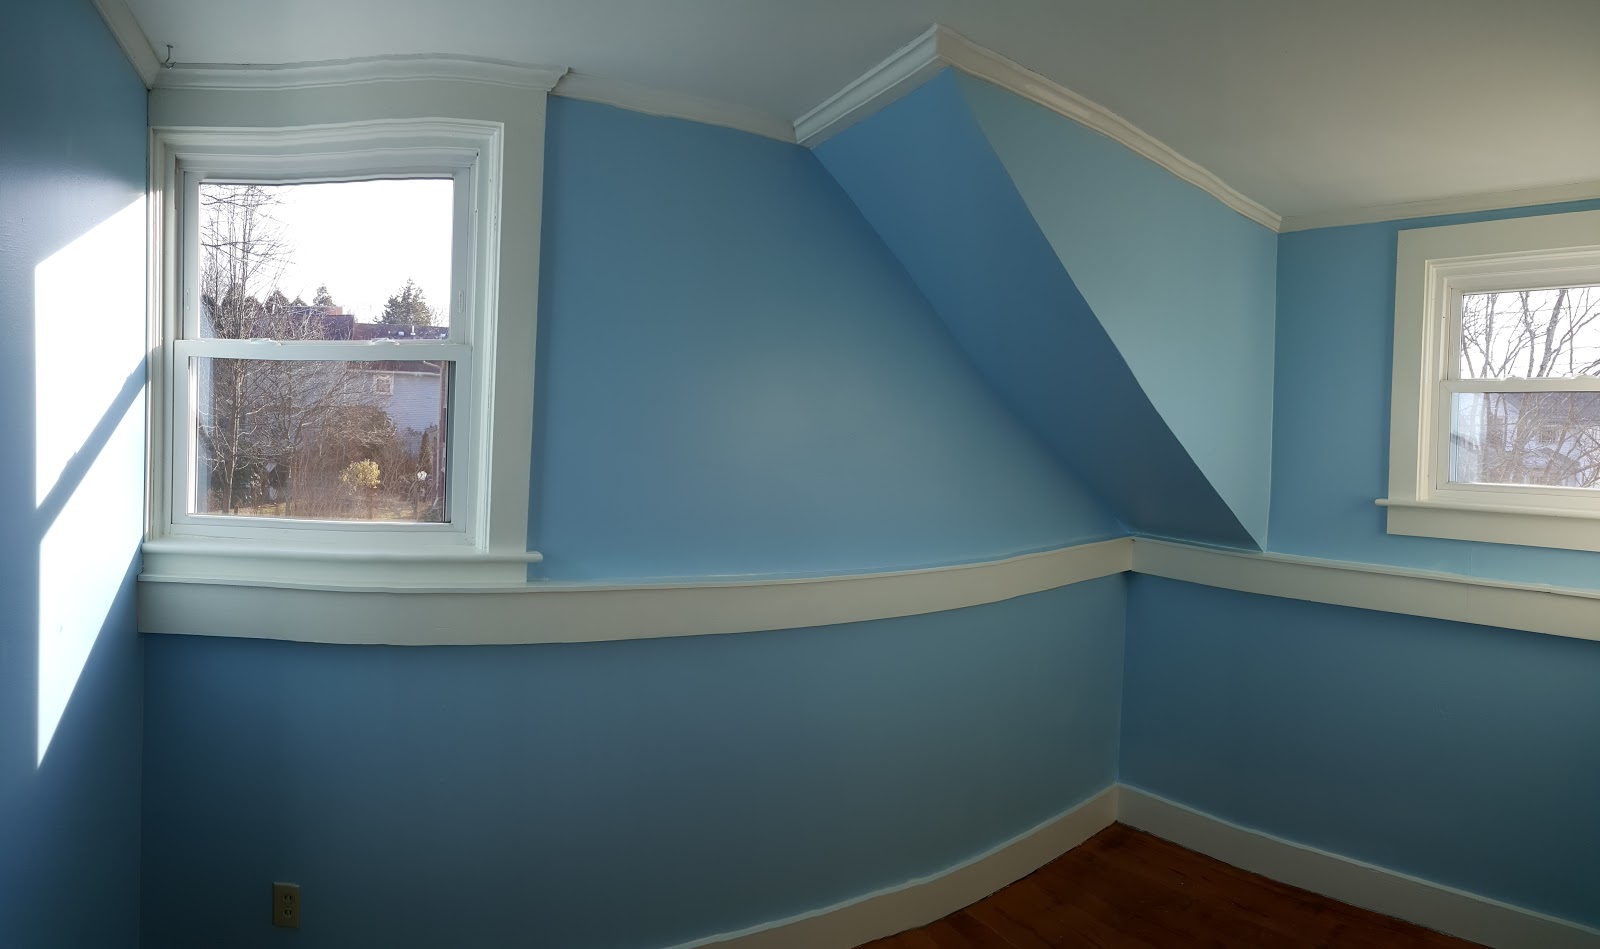
After a year or more of getting settled in a new place, a new place for a workshop has been established and a shelf layout started.  Step one, let's make the room sky blue and start day dreaming.

From there I made a few sketches for a possible model railway.


The thought here was that I could have fun with an inglenook and make just enough scenery to finish in the time we'll be living in this house.  Since I tend to favor structures and rolling stock, the layout is decidedly urban.  I'm keeping the Virgin and Lost Shore name, as well as the slogan, "the lost shore lines".

The bench work cantilevers off the wall and is attached with french cleats and T-nuts.  This will make removal a snap when we next re-locate and allow me to take the work with me.

Wednesday, August 29, 2012

Virgin Railhead 12

Back on Track

It has been a long time since I have had much time for the railroad.  Responsibilities, both for family and farm have kept me away.  I find that after I have been away for a little while, its even harder to get back.  Returning to the rails has not been a matter of spending large amounts of uninterrupted time, but of stealing a few hours here and there.

I placed the golden spike in the Virgin Railhead on Sunday.  Then began the list of trouble shoots, everything from checking the track gauge at the turnouts, and smoothing a couple bumps to accidentally ripping the Hump Yard switch throws off with a soldering iron cord: D'oh!

In short order I decided to rewire the turnouts to use Frog Juicers, set up a used NCE DCC system that I picked up on Ebay, and install two tortoise motors.  At this point, the entire module runs smoothly end to end, and everything is controllable from a wireless throttle.  All I need now is to finish building a handful of freight cars and I can have even more fun.

It's a good thing it all works, because finishing the rail meant that I had to do a little scenery as I went.  The street crossing and irrigation canal crossings had to be completed as I laid the track, otherwise they would be impossible to paint.  I probably have a little more painting to do, but they were far enough along to install.


Finishing the track work taught me a couple of things--not the least of which is that things hanging off the front of the layout are prone to destruction.  I also have a new favorite method for installing turnout motors: hot glue.  I am looking forward to moving on to scenery and structures on the Railhead, and am thinking about the next section, probably going to be river and mountain.  We will see.  One advantage of the modular approach is that you can have a few balls in the air at once.  With luck, I will continue to be able to carve out an hour here and there.


Sunday, January 29, 2012

Virgin Railhead 11

Well, the Railhead made a trip outside today--mainly for a couple photos, and also so I could blow the dust off of it and sweep up inside.

Not a lot of visual difference--after doing farm chores and building a new milking stand for Peanut (one of our goats) I spent about four hours tuning the turnouts.  I finally got over the throw bars, and accepted that I could solder and unsolder them at will--what is the worst that could happen?  I just have to make another one.  Here is the Gnat in some context for a change. . .


I used hardware from Hump Yard Purveyance for the turnout actuators--I installed them with enough slack so that I could re-mount them when I do the fascia.  All in all pretty slick items.  In the end, I decided to use a vertical lever actuated by the Hump Yard throw--  The throws are available at www.humpyard.com.


I like the way they work, and the Teflon sleeves and stainless actuator rods are easy to work with. 


Snap Snap go the points. .  .


Saturday, January 28, 2012

Virgin Railhead 10

I managed to get a little further down the line during the recording of Model Rail Radio.  I can't make full speed progress while listening, but then again, there is no such thing as full speed when it comes to spiking rail and soldering feeder wires.

I need to do some more work on the rust--I still want to add joint bars and some other details to finish things out--I am going to get the rest of the rail down on the module, then enjoy detailing the track.  I have to scratch build a couple of indicator/ground throws as well. 

I am glad that I am keeping things simple plan wise, because the magnitude of building everything by hand is sinking in.


That said, there is a great deal of pleasure in building something from the most basic components.  It was a joy to patch the ballast around the feeders, and watch then disappear. . .


Virgin Railhead 09

Well, I managed to "hotwire" the fast tracks Jig--meaning that I used it without PC board ties.  Instead, I soldered brass jumpers across the top of the rail..  I was just careful to bend the rail to perfect shape so that there was no tension in the rail.  I built both turnouts as one, painted and wired them, and moved them over to the ties.  I had to work back and forth to ensure that it all lined up.  Main rail is code 83, guard rails are code 70, so the tops can be rusted, but not interfere with track cleaning.  I made very minimal throw bars.

Here it is with the spacer bars hovering above the ties.

A couple more generalized views before spiking:


And here it is after spiking, with touch up started:


Looking forward to detailing and straight track. . .

Thursday, January 26, 2012

Virgin Railhead 08

Time for Ballast.  Bill (AKA Geezer) over at the Railroad-Line Forums pointed out that I might want to just do weeds and dirt, but I was already ballasting as he was making his post.  As I work on subsequent modules I am going to make some track without ballast--maybe even sunk into a section of swampy ground.

I have a pile of Adobe mix in my yard composed of local sand and clay--it matches the color of the ground, and the very tiny bits of stone match the colors of the local rocks--mixed--so, it seemed a logical starting place.  I sifted the various scales of material out and ended up with everything from "dirt" to "ballast" to "talus", and even some boulders that I have yet to sort out.  All good and useful, and the price can't be beat.  A big advantage of using real stone for ballast is that it does not float, like some brands of commercial ballast.

I ballasted in a fairly conventional way.  I placed the stone between the rail, misted it with alcohol, and then flooded it with adhesive.  The adhesive mix I use is 50% Elmer's Glue All, 25% water, 25% washer fluid.  The washer fluid works very well with acrylic products.  I use plain 70% alcohol from the drug store--nothing fancy, and spray just ahead of where I am gluing.  I don't do any gluing prior to ballast.

I am also a big fan of ballast before rail: no danger of fouling points, or otherwise messing things up.  To my eye, this is the biggest advantage of hand laying track.


I dry brushed everything with Unbleached Titanium White, both before and after ballasting to bring out the detail and add highlights.  As I work, I realize the layout will be indoors most of the time, and adding highlights is important to keep things feeling as if they are bathed with light. 


The prods from folks at the Railroad-Line also inspired me to diagram the rest of the line. I really have the bug--the track work is going well, and I am having fun. I am going to build in modules--which will let me skip around and adjust things as I need to. If I shorten or lengthen, it will be easy to change. I have a good size storage room with one door and no windows that will hold the lot of it.

Scenes from East to West:

1) Cable Works (based on a real cable works for transporting lumber down from higher elevation) The famous "Cable Mountain".

2) Lodge (Loosely based on Zion Lodge).

3) Loco service, once associated with nearby settlement, but now isolated--to expensive to move, so in the middle of no-place--a bit like some remote desert water towers on the UP.

4) Burnt out settlement, loosely based on Grafton UT.

5) Gravel Pit and remnants of flood.

6) Virgin Railhead

7) Funicular to raise cars up and down the lip of the Colorado Plateau. I am thinking of something like the inclines used in Cincinnati Ohio. . . a match for the geographic obstacle I would face if I were making the railroad in this place--and a way to make the railroad double deck (if I get that far), without hidden tracks or a helix.

8) Silver Reef, transfer warehouse to Union Pacific, Transfer Station. Probably need a passing siding here too. Railhead for Silver mines. I want to build some of the historic structures from this mining town--but am Pulling the UP down from Cedar City.

9) Long Causeway over relocated Salt Lake. Think about how the water looked in High Plains Drifter, filmed near Mono Lake.

10) Salt Works.

11) Staging

The great thing about modules is that if I get bored, or want to do something else, I am not left with a half finished model railroad. At the same time, I can get my "bucket list" of things I want to build out here.

There is nothing prototypical about the railroad--though I am borrowing freely from real places, and will borrow scenes from the "ghost rails" that stretch all over Utah.