Showing posts with label Model Building. Show all posts

Sunday, July 27, 2025

Lost Shore Operating Switch Stands

 I've put a linkage below each turnout to turn a target 90 degrees when the turnout is thrown--this was fussy, but hopefully worth it. I've been making the switch stands by modifying Wiseman Model Services cast white metal stands. Mainly, I'm putting a brass sleeve in the base, and fabricating new targets from punched brass discs. A 3d printed handle completes it.


This photo shows the parts included in the kit compared to my fabricated part. The kit parts are just not stiff enough to operate well or last very long. The kit still makes an excellent starting point. 

I'll paint and install these once the groundwork on the layout is painted so I don't knock them around too much.

Thursday, November 24, 2016

19th Century Freight Wagon 01

This is a mixed media model of a 19th century freight wagon.  The prototype for this wagon was used  widely from the late eighteenth century to the mid 19th century, though they were so heavily constructed many lasted quite a long time.  The shape to the body was designed to keep material on board while traversing grades.  

The model below is a quickly made"first draft" made of 3d printed parts and paper. Several parts need refinement, and the body height needs to be adjusted.  Looking forward to making the next steps and doing a more careful build of this one.


Tuesday, July 5, 2016

Dick Kerr 12

I've been slow in updating the blog, but the Dick Kerr Project is really moving.  There is increasing interest in the possibility of a Dick Kerr kit as people see the project in social media.  I've found that it's possible to achieve the extremely fine detail I want using the Form 2 printer.  This includes profiles beyond the published capabilities of the machine, providing things are appropriately oriented and optimized.  Very glad I upgraded.  A gallery of updates follows.  I'm looking forward to getting this painted.  The floor is laser etched from wood--the only part not made on the Form 2 at this point aside from a couple bits of brass.


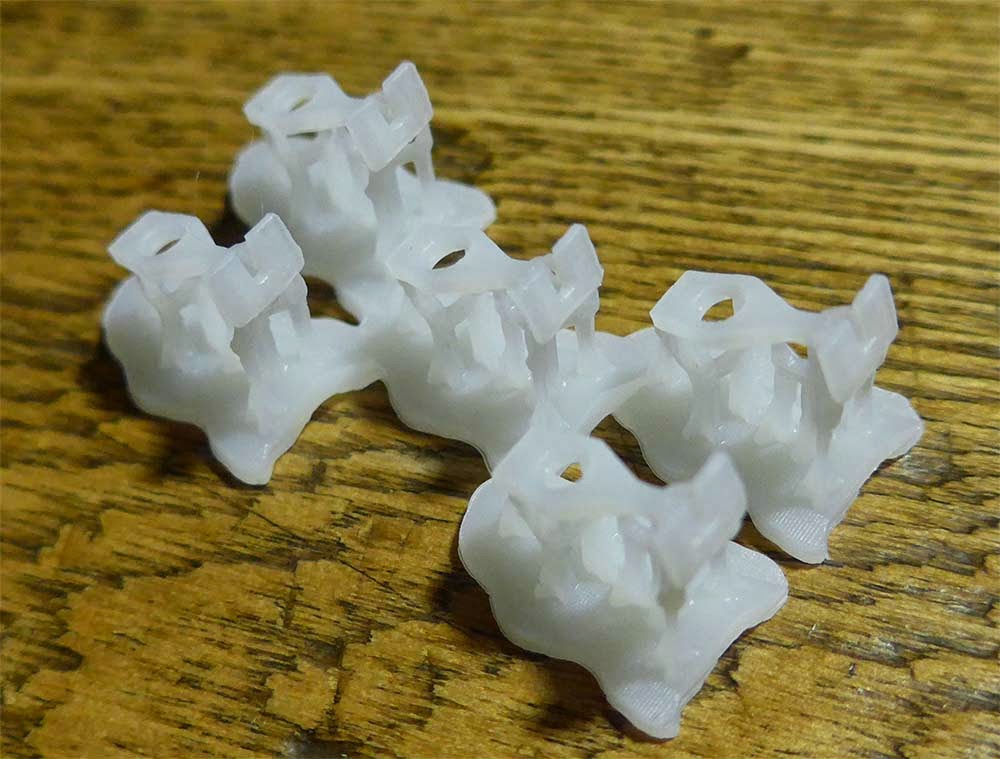
Backhead and gears fresh from the printer, Dick Kerr 11

The back head printed beautifully.  The control lever is a bit too far to the left.  I did this for support, but think I can now push it over.  Will also add rivet detail I think.


The chassis looks a bit abstract, but everything seems to fit right.  Looking forward to getting it off the supports.


Gears mesh well! I'm thinking this might actually work now.


Monday, July 4, 2016

Backhead and under the hood for the Dick Kerr 10

I've been busy on the Dick Kerr, mainly working on the "backhead" and technical items.  The detail in the above image looks crude, until you consider how small this little loco is, the cab could be mistaken for an HO scale RS3, and the interior here shown is just a fraction of that.  I've made a couple compromises, but, they should not be noticable through the cab door.


I've also designed a set of spur gears for the revised Mechanism.  The real work was done using the fantastic program Gearotic Motion.  I was originally planning to machine these with the Roland mill, but I am going to use these to put the Form 2 to the test today.  Any significant distortion will cause problems with these small gear of 9mm and 14mm diameter.  If they don't work I can always make them on the Roland.  If they do work, I may need to cast them in a softer plastic.  We'll see.

Bruce Wilson proposed a set up from Hollywood Foundry that looks very good--I may go ahead and make one of my mechanisms, and order a Hollywood Foundry item for the second, just to make the body adaptable to something that is not as custom as my solution.

Sunday, June 26, 2016

Oyster Car

Now that things are moving again, there is space to day dream about adding yet another project to the list.  Gasp! Not another.....yes, another.  But I promise there is more progress in the wings on a few fronts.


Colin King's post on the Friends of MRCS Facebook page gets the blame.  The little nugget he posted from Wikipedia for Schools led me to do a bit more digging, which promptly turned up a set of articles in The Cannonball, the newsletter of the Sunrise Trail Division of the NMRA.  The 2 part article series chronicles one modelers journey to building such a car.  I feel a lot better about my random pursuits reading this set of articles, because the author's journey is nearly as long as my life. By those standards I'm at least on pace, or maybe even a speedy modeler.  The two articles can be found here: http://www.sunrisetraildiv.com/ .  The two issues are fall and winter 2014.


Saturday, June 11, 2016

Boiler House

This is the last of the retro-posts, after this we're all caught up.  I've gone ahead and dated the posts in appropriate chronology to keep things organized.  We'll see if I can keep current for a bit.

I've always loved the steam boiler house at the Rhode Island State Capital.  It's traditional form and diminutive size make it a perfect model subject.  Added to the list!


Friday, June 3, 2016

Dick Kerr 09

A retro-post from June 3, 2016, we're almost caught up.

I've gone ahead and assembled the first set of Dick Kerr Prints.  All I can say is "wow" to the Form 2. Once primed, these will require very little post production.  I'm confident that I can make the body consistently.  Time now to step back and fill in a couple details such as the cab interior and the brake system.  Also need to work out the mechanism mounting.  Briefly flirted with the idea of making this little monster "dead rail" using my new Blue Rail Board from David Rees.


Thursday, June 2, 2016

Another retro-post to catch us up.

The Dick Kerr Coupler printed on Form 2.  The part is designed to fit a standard Kadee draft gear box.  I've added a vertical hole to the pin slot to allow cars to be coupled using a "staple" as a link.  I still need to test whether this can be done with a magnet, but I'll need to get some rolling stock going to do so.


Tuesday, May 31, 2016

Reviving Dick Kerr 08

A retro post from late Spring 2016..... I promise, we're catching up.


The Dick Kerr Project reached a stopping point when we relocated.  To be honest, however, I was at a frustrating juncture because I had designed the pieces based on what I thought were the limits of the Formlabs Form 1.  As it turns out, the parts I designed were right at the limits, and probably slightly beyond judging by the success rate and the gymnastics I had to do to print them consistently.

Enter Form 2.  Thanks to a loyalty upgrade, I switched Form 1 for Form 2.  Before I reworked any files I went ahead and set up prints with the existing file.  All I can say is that the improvements to the peel mechanism, resin level management and laser power make a difference.  Taken together with the addition of a tank heater, the machine is a dream.  Resolution is much more consistent.

Sunday, February 21, 2016

Uncle Paul's gets an awning

A retro post from Winter 2016.


More than a few projects came along for the ride.  It was nice to re-visit Uncle Paul's--I've been thinking about the awning, and decided it was time to tackle it.  The prototype has faded letters with soft edges, mainly from the paint or pigment "bleeding" into the adjacent canvas.  I think I can do it with the airbrush, but I need a frame to start with, so I got this bad boy soldered up.

Monday, February 1, 2016

Catching up on kits

A retro post from Winter 2016.


With a new place to work, I was finally able to catch up on a few kits purchased since the move. Carts from Train Troll, a Dory by Atlantic Scale Models, and tools from Alkem Scale Models.  I built the Train Troll kit's and the tools as designed, dedicating my attention to painting.  The Dory received minor modifications, including oar locks soldered from brass wire.  All fun builds that I'm looking forward to using on the new railway.


Sunday, April 6, 2014

Mack AC 01

I took a break from digital work to finish up a couple Mack AC kits that have been sitting on my desk.  Mostly airbrush work, though I took some time to detail the dump as a coal delivery.  Bernie Kempinski pointed out that these could appear in a WWI layout. . . . I may have to get another.  The kit by Backwoods Miniatures is excellent, clean crisp castings with beautiful detail.  A couple fiddly bits one needs to be careful with, but overall very robust: highly recommend the kits.


The coal truck features tarps that were made from tea bags.  I lightly airbrushed them with white, beige, and black, and then formed them using dilute white glue.  I'm thinking I'll need to make a terrain base for photographs, as the real terrain is vastly out of scale!


The green truck is just a chassis for the moment.  I am going to build a sheep camp to put on it at some future point I think.  I took some time to look at the prototype Mack paint jobs, and it seemed that all red and all orange schemes were common, as was a green on red scheme.  In most cases the running gear was in color. Given that these are likely for the Lost Shore layout, I faded them a bit, as if they had been in the desert sun.

Thursday, March 13, 2014

Dick Kerr WDLR 07

Everyone is probably getting bored of the Dick Kerr right now, but it's moving along.  Work has kept me away this week, but I still managed to finish up the cab.  I'm so happy with it that I'm going to take another crack at the sides--I think I can do better.  The test print of the cab is in the printer now.


One thing of note is that I "relieved" the windows in the cab, meaning I tapered the section of the wall near the window so they look near scale thickness.  This allows a thicker body wall. I'm going to give that treatment to the body sides.  You can see the tapering around the windows and the holes in the transparent version below.  I'm waiting to see the test print before I decide how to break it apart.


The other major step forward was developing a WDLR coupler.  I've designed it to work in a Kadee draft gear box.  I'm making a custom Kadee style box for the Kerr.  This way I can use standard Kadee centering springs, and allows for Kadee/WDLR couplers to be interchangeable.


My WDLR coupler head is faithful, save for an additional vertical hole I've added to allow for coupling with a small staple.  It's based on drawings and photos.  Here is the first test print.


Note the heel of the coupler is extended in this version--I had momentarily thought of an alternate centering scenario for use on a WDLR bogie, but quickly realized that the Kadee spring solution was a good one.

Tuesday, February 25, 2014

Water Tower 06


I needed a break from the Kerr, so I've squeezed in some time on the water tower.  I feel like both the Kerr and the water tower are in striking distance for completion, and that I want to get them done while I've got some momentum going.


It was a real joy to lay the shingles on the tank lid--miracle of miracles, geometry works.  My rings of shingles, each customized to match the pitch of the roof and account for the taper fit as they were designed.  I'm not sure what I thought would happen, but am always suprised when something goes to plan! The sheet above is one of three shingle sheets--if you click on the water tower label at the right, you'll get the whole history of this . . . . 


Between laying shingles, I took a break to draw a finial, and I also started work on the band clamps. . . . while I did not intend to use the 3d printer on this, I thought that the roof was looking so good a real cap was in order.  It's stuck in the printer until tomorrow morning, as I printed it along side a larger part--I can look through the acrylic cover and see it dangling perfectly from the build platform. . . . .


Sunday, February 23, 2014

Dick Kerr WDLR 05

I traced this page through a stray photo.  It's been extremely helpful to see the radiator more clearly, and to gain some insight on the David Smith Drawings.  Also a clear idea of the hood radiator relationship.  Also note this Dick Kerr does not seem to have the trademark spokes in the front wheel set.  They must have been changed out at some point.  Similarly curious about the exhaust--assuming that's also been revised.

From: http://railsvagabonds.canalblog.com/archives/2012/09/13/25098989.html
No sooner did I find this than Bruce Wilson turned me on to this page.  That's where this fantastic high angle photo resides:

From: http://www.tacot-des-lacs.com/
Seeing this caused me to reconsider how I was joining the hood to the body, and whether I wanted to model the rail along the hood as part of my casting.  It seems to me that I should lower the joint to fit this image better.  Bruce also found this image (attribution in caption):

http://www.16mm.org.uk/newsite/Christmas_Quiz/2012images/Loco10.jpg
This of course clarifies some of the assumptions I have made.  Radiator needs to be deeper, and the insulator bases are indeed massive castings.  The image below illustrates how I've adjusted the rivets on top of the hood to better fit the images here.  While I can't measure them directly, I can adjust the number and spacing.  I now better understand the position of the straps on the roof--those are steel joints that don't necessarily align with the internal framework which is more closely aligned with the doors.  The framework is reflected in the additional lines of rivets.  I've also simplified thicknesses, and accepted 1.5mm as the necessary structural thickness at the sides (where they are not visible).  I've also increased the seam carve away to .4mm.


After tackling the hood, I returned to thickening and revising the insulator and radiator based on the photos.  The text on the radiator was bigger than I thought based on the David Smith drawings, and I chose to exaggerate it a bit more, hoping to make it legible in 7mm scale (1:43.5).  I also removed the "rails", figuring those could be added later with brass if I chose to do so.  I imagine a lot of these items (radiator cover, details) were removed by soldiers.  While it's possible that these parts were not removed until the units were resold as surplus after the war, soldiers are notoriously practical, and hate to waste time.


Here's the revised hood and radiator assembly.  It's off to the printer now.  I am looking forward to spending time on the cab tonight, after some time away from the computer. Getting exciting--I'm hearing the engine in my imagination. . . . .