Showing posts with label Structures. Show all posts

Monday, December 31, 2012

Engine Crates 02


The engine crate shed is moving right along.  Efforts of late have focused on "piecing" in a couple of the construction gaps, painting hidden edges, and building an adequate foundation.  

The foundation is a small plane of wood drilled to accept the piles.  This places the piles inboard of their position in the photo.  I decided to deviate here, as I much prefer the strength of a positive connection.  The floor and body are a slip fit, so, adding light is still an option.  That the walls have a black core helps in that regard.  While I am going to wait to do final scenery until I put this one on the layout, I am going to go ahead and make a diorama base for this one.


I also added a stove pipe soldered from three pieces of brass tube, as well as a foil ridge cap.  The sienna paint from the ridge cap has been streaked down the roof.  A little more under the stove pipe.  I have slowly been adding paint to the boards to make them appear more varied and three dimensional.  I am now on a quest for material to add the mesh below the floor.

Pickard's 01


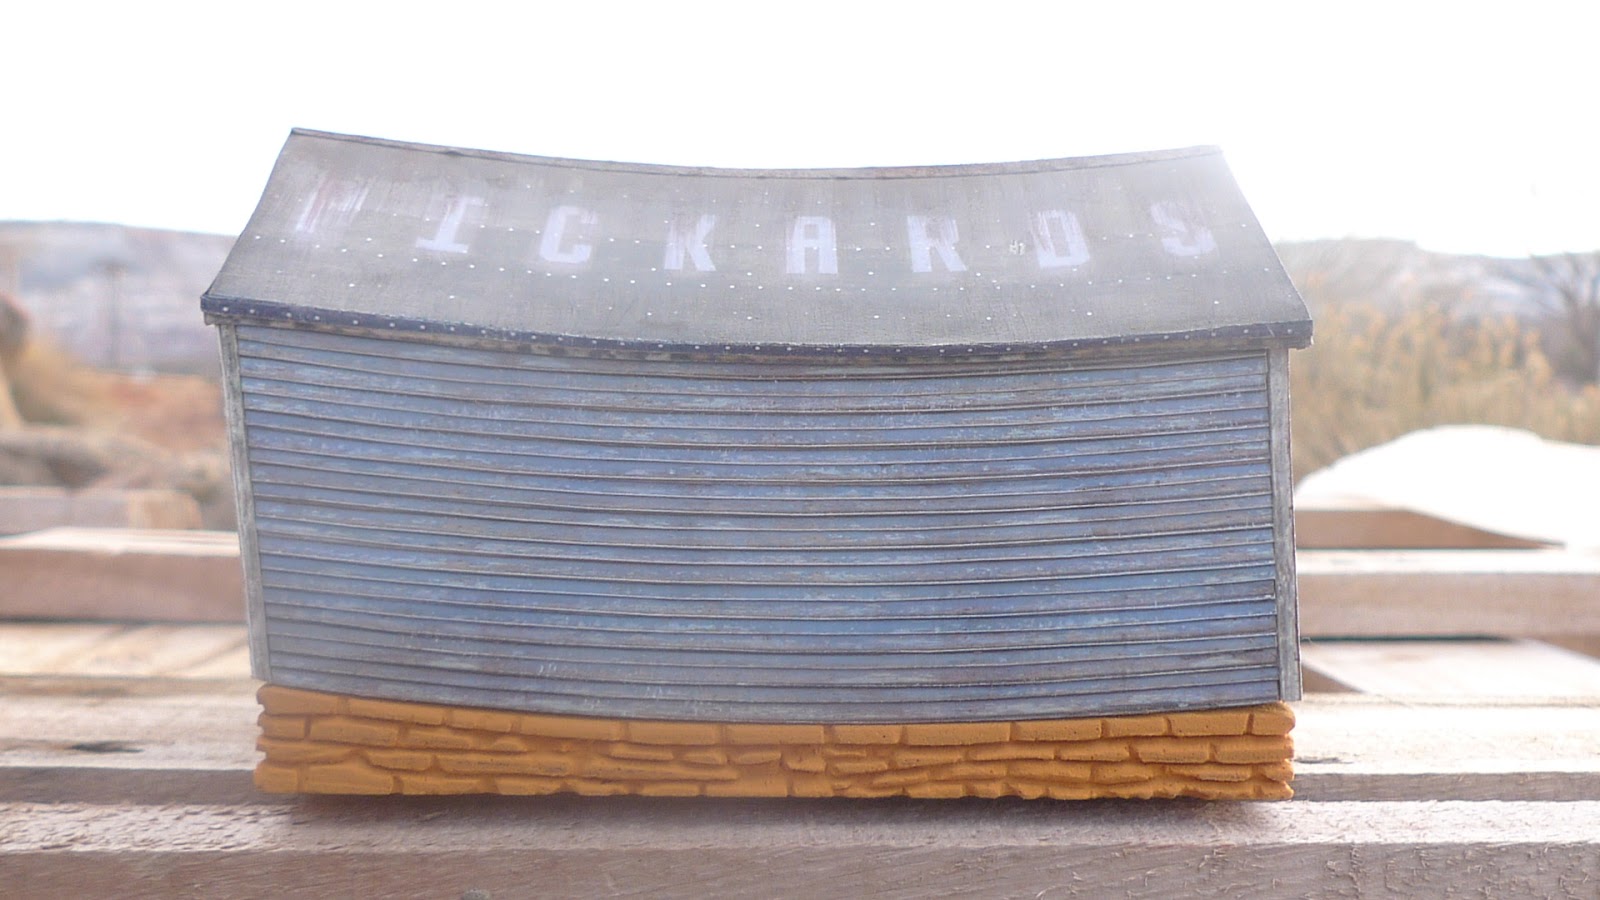
I've been holding out on you all just a bit, as I have a couple models that I have not been posting. . .  .gasp!  This one was under wraps because I was wanting to surprise modeler Dan Pickard on the Model Rail Radio Facebook page.  This is all a roundabout way of honoring the construction of a new shed he is building to house his model railway.  Hopefully the real thing will be a bit straighter than this.  I take particular pleasure in making buildings that move and sway.


The other interesting aspect of this shed is the fact that virtually all the coloring is printed using Clever Models textures.  I used a process similar to the engine crate shed, working back and forth between Photoshop and AutoCad.  This allowed me to "curve" the clapboards and create a cut file that matched them.  I borrowed the cut file for the window from the "Shifty Shack" and colored it using Photoshop  integrating it into the art for the whole thing.  The latch is simply a photo of a rusty hasp dropped into the door art.  The door and trim are made from another Clever Models texture.


I warped the tarpaper roofing in a similar way, adding the "Pickard's" logo on top.  The typeface was purchased from My Fonts which is my favorite source for letter forms. . .  . .I'd rather pay a little, and get something period appropriate.  With the success of this experiment so far, I went ahead and immediately bought a few more textures from Clever Models.  Foundation is Balsa foam.  Look forward to more on this line of work.

Sunday, December 23, 2012

Engine Crates 01


Every once in a while you see a picture that just grabs you.  That was the case with a 1939 photo of a small shack in Texas.  I became aware of this particular image by way of the Fine Scale Miniatures Yahoo Group, where Darryl Huffman posted a link to the photo on Shorpy.  Darryl is a font of information, he sells all manner of DVD's and information related to fine model building (His site is here).  Fortunately for me, he is also great about sharing good Shorpy finds.  If you have not been to the Shorpy website, it is a great place to find inspiration and loose track of an hour, two. . . or three. . . . or four.  The image from Shorpy is below, my basic body build is above (sans metal details, painting, etc. . .just the facts of printing, paper and glue).


The essential feature of the shack in my mind is the fact that it is made out of Wright Aeronautical Corporation Aviation Engine Crates!  Given how interesting the crate printing is, I decided to make a printed model, much in the vein of the paper boxcars, except for the fact that the artwork is entirely derived from the single photo.  I used similar techniques to those that I used to do the signage for Uncle Paul's (a project I am still working on).  The major difference here is that in the Uncle Paul's project, I simply re-worked and extracted the signage.  In this project, I am really trying to work entirely from the photo.


I began by flattening each of the two sides of the shack in photoshop.  This was done with the "transform" command under the "edit" menu in photoshop.  If you are not used to working in photoshop, the key thing you need to keep in mind is that to apply a command to the photo, you first need to select it using either the lasso or one of the other selection tools.  In this case, I just transformed the entire photo twice, and then combined them.  Under the "transform" command, you will find several useful options, including distort, skew, perspective, rotate.  I use all of these commands and more to coax the image into something that looks like an unfolded elevation.  


From there, I did some basic color work.  I tweaked the contrast and saturation to bring up the detail, and push the black and white image towards brown.  Using duplicate layers, I created a light layer and a dark layer, white and brown respectively, that I applied as transparent overlays in order to enhance the detail of the wood.  After that, I carefully edited out the mop, and other three dimensional details.


Once I had some credible material, I created a set of back walls and also began to copy extra parts that I would need when building the model.  The image below shows my basic art work sheet. After some last tweeks I adjusted the DPI to suit the scale and print size, and I was off to the races.


Once I had my basic artwork sheet done I loaded it as a "raster reference" in Autocad.  I simply traced the various layers that I would need to cut with the laser and created a layout for a simple bass wood core.  While this could have been done manually, I decided to go ahead and make a set of cut files in the event that I wanted to remake and refine the model further.


After all the lead up, I am excited to detail the model, and add some paint.  The impression I have now is that the photo might be too detailed for the scale, and that I need to tone things down a bit to have it settle in.  I think it will improve as I add in details.  One thing I have come to understand is that these things tend to look better and better as one follows through, so even if it is not feeling 100% yet, perseverance usually pays off.  I'll get some details on tomorrow, and shoot photos in some better (and even) light. . . 


Monday, November 26, 2012

Shingle Shed and Shifty Shack 14

It's been a while since I worked on the Shingle Shed, but I made some progress.  I took a break from freight cars and cleaned the workshop.  In the process, I found some doll house molding that I misplaced.  I had bought it with the intention of using it for the eaves of the shed.  Finding this lost treasure was all it took to get me back into the building.

I gradually finished out the corner boards and eaves. The roof is a double layer of chip board, and the tar paper is used tea bags colored with acrylics.  There is still some detailing to do, but the thermal enclosure is done.  Looking back at this earlier paper model makes me realize how much more efficient I have become.  There are several spots in the shingle shed that are over engineered.  I am going to have to look back at the Virgin Church, and see if I can't speed that along in light of my realization.

Too bad that the module that this will go on does not even have a baseboard.  Thinking that I am over complicating those too, and need to get my head out of my behind and accelerate that process with a simpler construction technique.  Plenty time to think about that while I dawdle weathering and finishing the shed. . .  .

Just as a side note, I did use that Tite Bond 3 to glue things together. .  . it only looks like I drink it.

Sunday, December 18, 2011

Shifty Shed and Shingle Shack 13

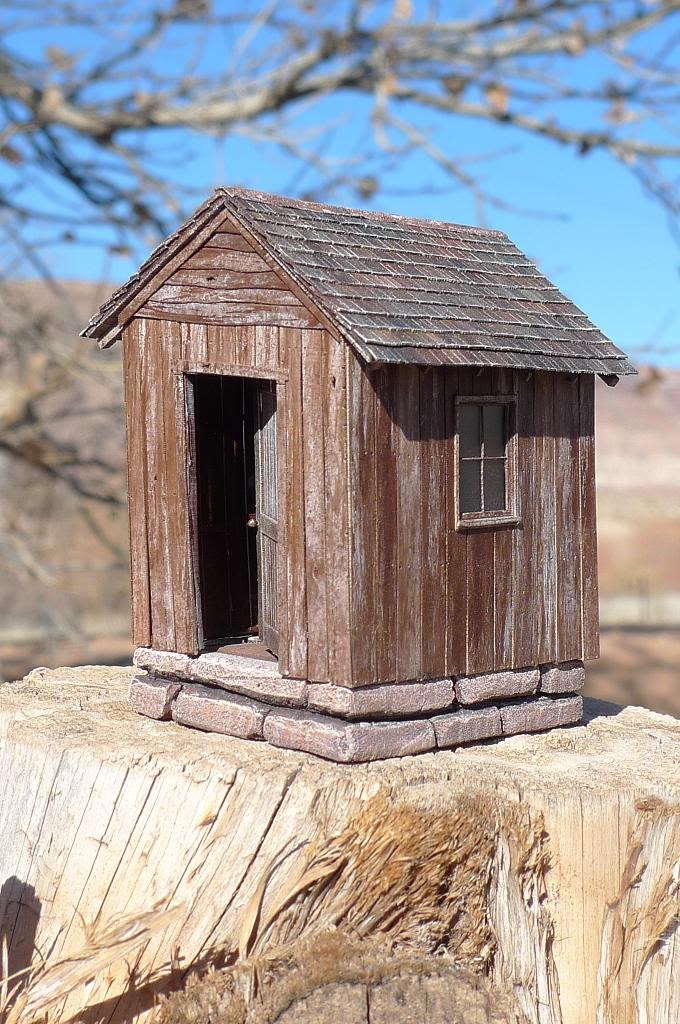
The last week has been very busy, but, I managed to squeak a few hours in on the Shifty Shack.  I carved the foundation from Balsa Foam and colored it with acrylic paint so that it looks like local red sandstone.


I photographed it outside on a fence post--I am looking forward to building more of a habitat for it--a little model railroad.  I have also been thinking about the night view--hence the little lantern made from the guts of a Christmas light bulb.

The Turkeys came to investigate while I was photographing the Shifty Shack--hmmm, who to choose for Christmas dinner? 

I was inspired by Greg S.'s recent posts on the Railroad-Line Forums, as well as comments from friends to make the little LED lantern.  The plan is to put it on a little laser cut table in the shed so that the light from the lantern will spill out between the cracks between the boards.


I started by burning a few LEDs out in order to determine the voltage--it seems they are rated for somewhere between 3-5 volts--they won't light at 1.5, and they burn out at much higher voltages.  I used a little brass wire for the handle and laser cut a base.  I replaced the LED leads with magnet wire.


The resulting lantern might not be what I want to put in a foreground situation, but it is not bad either, and should be convincing on the table in the shack.  I have some ideas for improving the next one.  The most difficult part of the entire affair is the physical handling of the magnet wire--that stuff is fiddly!

Managed to get the supplies I need to finish several projects--so the next week should be fun.


Sunday, December 4, 2011

Shingle Shed and Shifty Shack 12

This is the foundation as it stands now. . . after dry brushing.


The uncarved bits are where it will be set into the ground.  I may go back and paint it one more time.  I wanted the foundation to look "cool" in order to warm up the wood.  If I were to go back, I would just repeat the previous procedure, building up more layers, but shifting the color slightly.  Before I decide whether I want to do that or not, I am going to take a look at it in the daylight. 

My desk lights, and the T5 fixtures in the workshop are all lamped with 3500k color temperature florescent bulbs, which are pretty darn good for color--all the same, I like for the models to look good under daylight or artificial lighting, so, before making big decisions I like to check both.  A good excuse to take a break after the sun goes down!

Shingle Shed and Shifty Shack 11

I started painting by first priming the "stone" foundation with some blue-gray latex paint that was laying about, a left over from painting a chicken coop?  Not sure, but it looked like a good starting color.  I stippled it into the balsa foam so as not to kill the texture, and ensure good adhesion.  Stippling also helps adhere any dust that you did not manage to dust or blow off.  I like to start stone (or shingle) painting with some color--blues for granite, reds if it were sandstone. . . but some color.  Anything but gray.


To that I add some other colors, mixed down yes, but clearly colorful all the same.  A lighter blue, a yellow, a sienna, and a red.  Not to fussy about it, just to get some variation in the undercoat.  Looks like one of those "Brick Face and Stucco" jobs from the 60's or 70's at this point.  In almost every case, I don't like the color to sit on the surface, rather, I layer it up, and allow previous layers to show through.  Those of you offended by the brightness of the above will be relieved when I. . . . .


Hit it with a control coat of 50% gray.  In this photo it is picking up some light.  Some of the gray will invariably come off, so, it is a tad heavy, but not bad.  Just a mixture of lamp black and titanium white acrylic blown through the airbrush--no need to get more complicated, since color from underneath comes through.

I left things to dry for a while.  An important step.  If you don't, working wet on top of this will result in paint soup. . . not good for models, and not flavorful.

The next bit looks scary, but it is not. . . . I put some ink (the cheap stuff for learning caligraphy) in a porcelain tray,  I also had some plain alcohol handy. 

Alternating between the alcohol and the ink, I blotted the wall heavily, my goal being to get the ink into the pores of the balsa foam (that is where stippling the primer coat helps--maintains the texture). 
Looks scary, but notice the sheen.  Paint has the foam sealed, so one can blot off the wall with a brush, or even a paper towel.


In the above photo things are still wet, but you can see how the ink finds and loves those painted pores of the foam.  Almost there.


Before going further, I did a little color check against the adjacent work.  It all looks dark, but that is ok, since the next step is to lighten it all up with some dry brushing of white paint. . . nothing more, nothing less. . . .


Shingle Shed and Shifty Shack 10

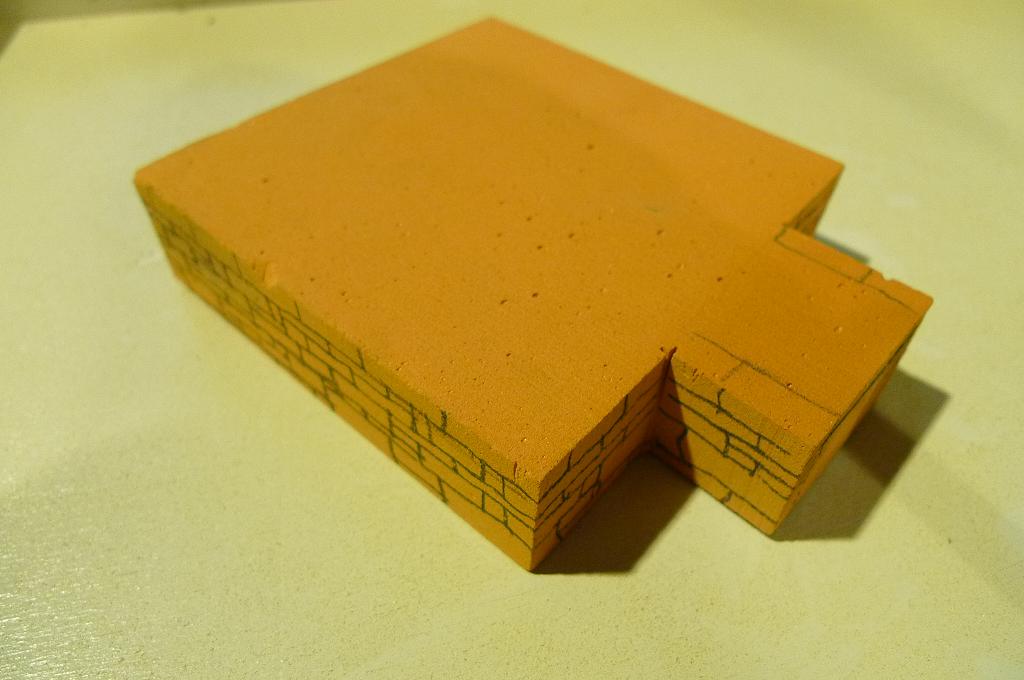
I continued to carve the balsa foam foundation.  The following photos give a clear idea of the process.  One begins with the basic outlines.  Next step is to progressively carve the stones, ultimately shaping them so that they seem to be individual stones.  The last carving step (to my eye) is to give the stones some surface variation, so that there are some "ins and outs".


As I near the end of carving, I am careful to test fit the foundation, and make any subtle adjustments so that the building and foundation will "feel as one" when ultimately joined.

You can see in the above photos, I carved the cobble ramp to the door, and adjusted the stones in on the back, giving the wall a "battered" appearance.  "Battering" meaning that it slightly steps back as the courses become higher.

Next step, paint!


Friday, December 2, 2011

Shingle Shed and Shifty Shack 09

Started carving the base for the Shingle Shed last night. 

The basic form was cut from a block of balsa foam using a back saw.  After I was satisfied with a drawing of the stone pattern, I proceeded to carve with a #16 blade.  If folks are interested, I will try to make a video showing how the balsa foam handles.  I love the way it carves--it really does "feel" like balsa without grain.


I left the tool marks, I think with some sanding, they will end up looking like part of the stone. . .  .

More sometime on the weekend.

Tuesday, November 29, 2011

Shingle Shed and Shifty Shack 08


Made a few daylight pictures this morning, with a better view of the roof.  There is nothing like sunlight!  Whatever I do with the building foundation, and, the "something yet to be determined" it will go on, I want to make it portable. . .


My wood floor is pretty rugged--it was recycled from an old foundry, and installed as is. . . . so, my penchant for weathering extends to interior finishes!

Thanks for looking.  There are photos of every step in earlier posts. . .

Monday, November 28, 2011

Shingle Shack and Shifty Shed 07

Well, sadly, I was so excited, I did the roof without taking any pictures.  I laid the shingles on long, trimmed them with an offset chisel blade, and then cleaned up the cut edges with a little paint.  A little dry brush with white, and I had a credible roof.  Painted some foil tape to look like rusty metal, and I had my ridge cap.


Will have to take a daylight picture.

I went on to start carving foundations for the Shingle Shed in Balsa Foam, but had to stop to make dinner. . . . . more on that one when I get back to it.  Folks on the RR line indicated that they wanted to know more abut that, so, I will have to make some good photos.  Here I though everyone knew what Balsa Foam was. . . .Still thinking about the base for the Shifty Shack. . .

Shingle Shack and Shifty Shed 06

I switched back and forth between both buildings so things could dry.

But started getting excited about the Shingle Shack, as the end of the superstructure was in sight.


I took it into the light, and it was exciting to see what happened with the gaps in the boards. . . .


The door knob is made from thin solder, with a little paint rub.  The door is paper, just like the building.  It has a paper hinge, but is glued in place.  It could move, but, I figured a moving door was an attractive nuisance.

The window was sprayed with lacquer--the clear glass looked cool, but made absolutely no sense considering the dilapidation of the structure.

After hurting my arm patting myself on the back, I darkened some of the shingles that I made for the Shingle Shed to go on the roof of the Shifty shack.  The trapezoidal roof bits fit spot on. . . thank you laser!