Showing posts with label Rolling Stock. Show all posts

Monday, August 11, 2025

Repair and weather for fun

 I kept on the painting kick after the Tals wagons with this little gem from the late 19th, early twentieth century by Brawa. It started with a broken step and broken hand rails. This required some fine soldering. When all was said and done I added a "Stoffdach" (fabric covered roof), did some acrylic weathering, and progressive fading to make this look like a cared for, but well used wagon at the end of the "länderbahn zeit" (state railway period) in Germany before the multiple railways were consolidated. Although this wagon does not have air brakes fitted, such wagons were allowed in mixed service provided they were affixed to the end of the train during the period when air brakes were being adopted--an interesting operational detail. 


Some shots of the repairs below. These Brawa wagons are lovely, but easily broken during handling, which is why I chose to repair with brass instead of 3D printing the grabs. 


Tals two ways


I bought these two Tals 968 wagons on my last trip to Germany at modelbahn Herman in Oberwesel with the idea of doing some weathering experiments.


The Tals wagons have pivoting roofs and are used to carry water sensitive, sometimes corrosive materials. It's not uncommon to see them entirely white from lime, or, streaked, or even with paint failure. I wanted to try two distinct things, paint failure and a bright streaked appearance I saw where the oxide red was vivid. This is the result, a combo of Valejo acrylic and oils. I'm happier with the paint failure, despite the epic amount of hand painting. I may return to the streaked version. There is a subtle difference between the doors and the top of the hopper that is hard to get right. It's different in the prototype, but difficult to do in the model, because it's just a bit too subtle I think. I'm going to live with them for a bit, then go back and add some dust and finishing touches when I digest them a bit more.

Some process shots showing the initial paint layers on each care and the variation in the initial shading/fading that was done:


Monday, July 29, 2013

MRR Contest Build 05, Passenger Cars 05


I'm in the midst of building three structures for the shelf layout build.  At this point I have not "built" much of anything, save for the cement silo.  I put "built" in quotes because I have spent time in Photoshop doing some virtual construction.


I've purchased several textures from Scale Scenes, Clever, and even taken a few items from photos.  These are laid over a schematic cut file that I prepared based on the "site dimensions".  Those cut lines show in the images included here, however, I don't print them--the identifying text won't print either.  The black lines in the upper left corner are my registration marks for the laser.  I've also done some virtual airbrushing to break up the monotony of the printed texture.  It does not look like much, but it helps.  Shadows and reflections give things dimension in advance of weathering with other means.


I've also removed the silo from the mold, and the mold came out fantastically well.  I'm excited to make at least a couple structures for this and future layouts.  If I'm lucky, someone will want to trade, as the mold will clearly have some life!  At this point I am about 19 hours into the build, including mold making and computer work.


The passenger car roof mold came out well too.  I'm excited to start making a few of those, but that will have to wait. . . . for now.


Sunday, March 3, 2013

Passenger Cars 03

Last I posted on the Passenger Cars, I had a plug of the roof pretty well done. . . . turns out that in my frenzy of work I managed to make it many feet too short, and my already short 41' car was shorter than it should have been.  That's what I get for rushing.  Good thing that plug number two went much faster, as most things do the second time around.


I returned to the drawing board, and re-cut some new sections from my original cad file.  Rather than jigging them on a spline as before I jigged them in a wooden tray, which worked much better.  It was much straighter and stronger after gluing and required less Bondo to smooth.


Here is the piece after the Bondo, some sanding, and some paint.  I am still debating how I will make the finished product, whether it will be a casting or a "lay up": I'll need a mold either way.  Sorry to say that there is not much else to post this week as I have been travelling for work, and we are in the throws of lambing.  Even with the challenges I'm hoping to keep the Christmas time momentum rolling.  Still a few more hours tonight to do something on the Church. . . .

Sunday, January 27, 2013

Passenger Cars 02


I've managed to get the plug for the 41 foot roof finished.  I'm calling it a plug because I'm going to use it to make a mold for a fiberglass part.  Fiberglass is not customarily used in model railroading, but I don't see why it won't make a great passenger car roof.  The following video gives a little tour of the around the plug so far. . . .


Tonight I am going to paint it, and begin prepping it for mold making.


Saturday, January 19, 2013

Water Tower 05 / Passenger Cars 01

It's been a bit since I had any time in the studio.  Part of the hang up is work, the other part is cold weather.  I'm comfortable most of the time, but it gets hard in the extreme cold.  On the bright side, that means I have had some time to work on designs, and do prep work for new projects.  One of those new projects is a stub switch, and I hope to post on that tomorrow. . .  .


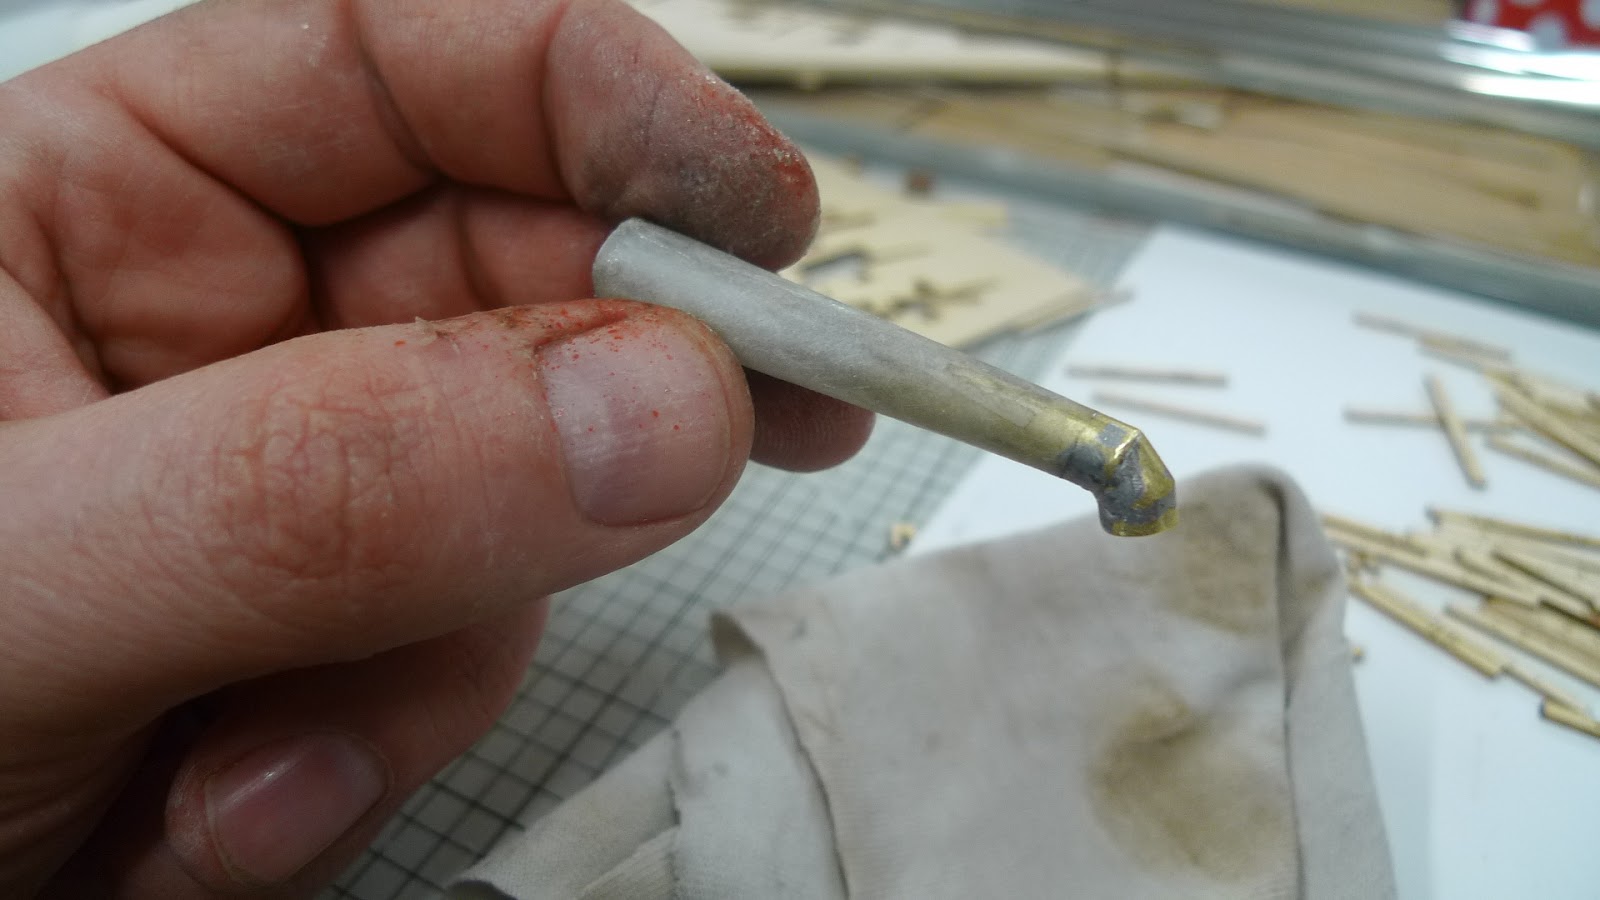
The most notable progress today was on the spout for the water tank.  As I have decided to animate the tank, it took some time to think through how I would make the spout.  I ended up settling on a combination of brass and tracing paper.  I soldered most of the spout from brass, but built up the tapered section with CA soaked paper.  It sounds sketchy (forgive the pun), but in actuality it worked really well and went much faster than turning the part on the lathe or fabricating the cone from brass.  It also took on a couple wrinkles that will help it look more like beat up tin, a good thing.  The fin will be mostly hidden when I am done--I just needed something to attach my actuator rod to.  I am going to send it down through the supply pipe.


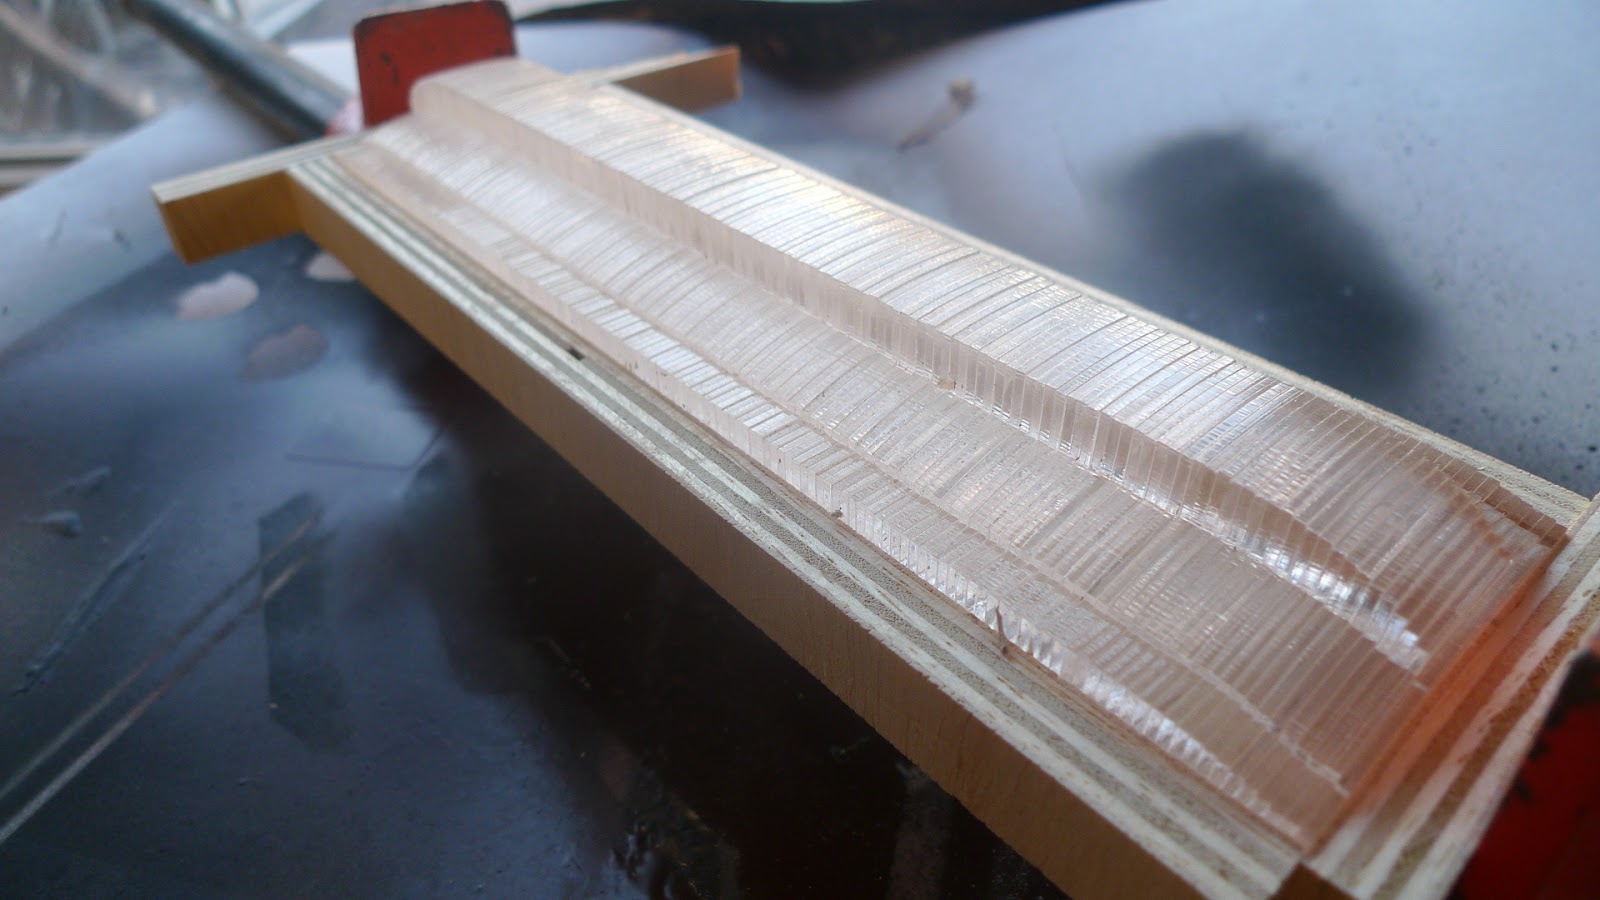
I also embarked on making a passenger car roof today.  I deliberately chose a prototype that did not look like a Bachmann brand car.  While I appreciate everything that Bachmann has done for ON30, I don't want my railway cars to look like Bachmann redux, and I fear that is what would happen if I modified one of their roofs.  Not to mention, making the duck bill was pretty straight forward once I did a drawing, dividing it into sections.


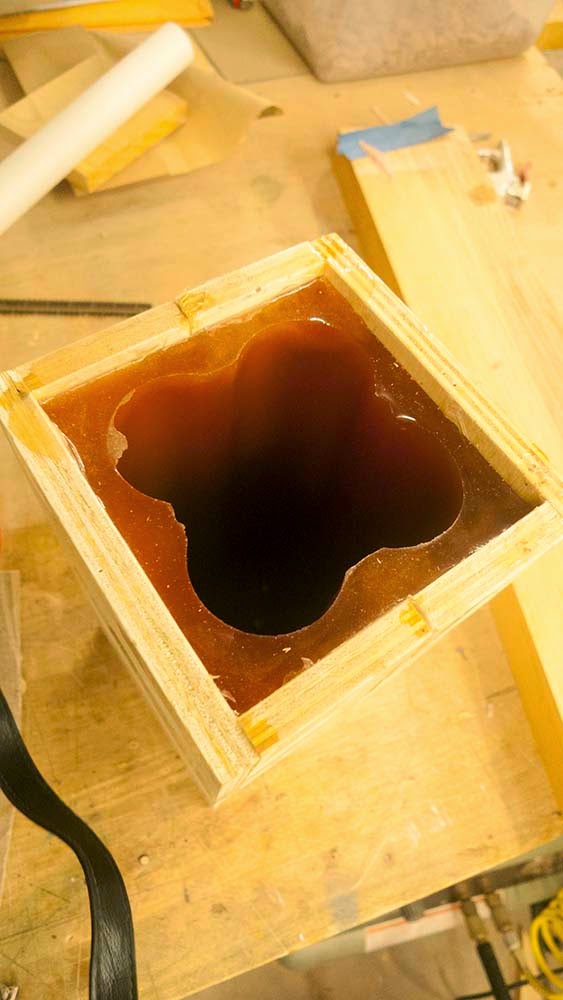
After stacking the sections, I sanded the "duck bill" to shape, and set it up in a mold box.  Note that the fascia boards are not part of this piece, they will be cut separately when I build the cars:  I had to think through the assembly a bit.

Ultimately the plan is to cast two ends in epoxy and create a middle section of the appropriate length between them.  After that, I will make an open face mold so that I can make thin fiberglass roofs (allowing for detail, clerestory windows, etc.).  It sounds complicated, but if I am efficient with materials it will cost me less than a single Bachmann car, and give me a better more unique result. . . .  .we'll see how it goes.  At a minimum, it will look unique.  The red paint, by the way, is just what I had on hand to seal the roof end and the mold box.


Monday, December 31, 2012

Uncouple Anywhere 05, Happy New Year!


I've been racing to finish a lot of models with an eye to 2013. . . there are so many models I want to make that I feel like I need to finish a few.  To that end, I have been pouring energy into the servo uncoupler, and every other model on the workbench.  I'm even going into mass production on the boxcar guts. . . 


Of course, that means queen posts and bending truss rods. . . hence the spray paint pattern above.  Clearly, these won't be done in 2012!  So, time to take break and wish Joy and Peace to all. . . . Happy New Year.

Thursday, December 20, 2012

Uncouple Anywhere 04

I have been working on the guts for the paper boxcars, and in doing so have been evolving the servo uncoupler.  The first version which I made for Salt Wagons 1.0 swung the coupler down.  In the boxcars, I am planning to drop the couplers straight down.  This will make things absolutely reliable when the couplers happen to be under tension.

I played with all kinds of attachment methods for the draft gear box and decided that fabricating brass draft gear was the cleanest, strongest and most reliable.  The servo horn will act directly on the vertical shaft so there is very little slack in the mechanism (I still need to add the slot to the shaft in this picture.


I made a batch of draft gear box / shafts.  These were later changed to eliminate the overhang at the back of the shaft.  The entire works slides up into the boxcar body like the bottom half of a hat box.  A couple tabs projecting from the floor hit the pockets on the side of the body, and the mounts inside support the ridge beam of the box car.  Together, the assembly is very solid.  I kept the middle of the boxcar clear in case I want to do a ventilated box or open door.


Doing this has made me re-think the salt wagons.  I have some small servos, even some linear servos.  If I play my cards right I see no reason that Salt Wagon 2.0 could not have a straight drop.  I also see that I could put the works in the roof of a stock car.  I am going to get these boxes worked through before designing anything else.  I learned so much from the salt wagon mechanism. . . I'm sure the same will be true for these.

Sunday, November 25, 2012

Paper Boxcars 03

I'm in love with paper.  Considering the success I've had with structures like the shifty shed, it is baffling that I did not turn to it for rolling stock sooner.  A gap in the imagination that has been resoundingly filled.


The results so far include 4 box car bodies, the two Klyzlr boxes, and a couple testing the Photoshop template.  The car is based on a boxcar from Slim Gauge Cars.  I like the chunky proportion, and working so closely to plan makes me realize that the salt wagons are in fact a bit narrow.

In drawing the cars I created two extra layers, one was a registration line, the other was a text guide.  Those lines and guides are in each file.  By taping a piece of cheap chip board to the stage and cutting the registration line I was able to create a fixed template.  The printed board was slipped under the template, and lined up.  This ensured registration.

Each box consists of two cut sheets, a detail sheet and a body sheet.
Rather than print on white card I printed the bodies on acid free paper and mounted them to black card.  This saved me from having to marker edges of the board later.

I added color to the bodies using acrylic washes, and straight acrylics.  The grab irons are staples left over from my broken staple pliers--might as well use them.  Bottom door guides are wires. The shot above shows the end prior to having the transom attached.

Today's task, if I can make the time, is to get the uncoupler guts configured.  I also have some work to do on some other designs.  I am going to spend some time considering a way to do a two sided registration such that I could make a paper gondola.

Thursday, November 22, 2012

Paper Boxcars 02

The paper boxes are progressing, even if only on Photoshop.  Spent much of the week re-working the art and the cad file.  After locating the grab irons and details on the cad model, I went ahead and created a template for Photoshop.  This will let me get artwork going for any number of cars in short order.  Becoming serious about the details of the car also forced me to rework the Prof's car.  That's fine, because I made an error in the name, including an initial that did not belong.  Prof was fast on the correction, and I could not let the error stand.  The final artwork read's "Prof. Klyzlr's Pummel Proof Encyclopedia Sacks."  I'm pleased to report that car 519 is also progressing.  I plant to take the rest of Turkey day to finish the guts of the car, and hope to start cutting them tomorrow.  519 includes graphics, and I have some serious art planned for the tomato car.  Hoping that the proof of concept works with the text based bodies.


Saturday, November 17, 2012

Paper Boxcars 01

As I finish the Salt Wagons I have started to design a set of boxcars.  The plan so far is to print the artwork on card stock and then laser engrave texture into them, making something like an old kit with embossed paper car sides.  The first wagon is an homage to the Prof. . .  .if you have yet to be pummeled, just tune in to Model Rail Radio, and it will all make sense.

This is the current draft of the car printing, not yet in color.  I have been laying the artwork out in cad, and then moving into Photoshop to make sure that the registration marks line up.  I have a "tomato" car in mind, and I am excited to do some more elaborate art work.  For the time being I am doing proof of concept with text.
The earlier draft did not have a car number, and I thought the slogan was to prominent.  The car number is essential, since that will be the digital address of the uncoupling system.   I also wanted the humor to be a 'tad' more subtle.  I have been toying with the color, and I am pretty excited by being able to produce a faded boxcar red right out of the starting blocks.
The layouts for the printing and engraving are progressing.  The superstructure will be built in layers for surface relief beyond the engraving.  I still have to lay out the grab iron and bolt locations.  I am measuring staples--seeing as I hate bending grab irons, and fine staples might just do the trick. 


Sunday, November 11, 2012

Salt Wagons 01

The salt wagons are slowly taking shape.  It's been a while since I have posted for the simple reason that posting repetitive tasks gets really dull for readers. . . "look, more flash removed from detail parts" is just not exciting.  Most of them are still in the tray, waiting to be put together.  Never mind that a wheel is off the track in the photo above--it was the only way I could keep it from rolling off one end or another.

I made several wood trays to hold projects--actually, I had originally built them to hold color sample sets for my architectural clients, but they are more frequently used to hold models in progress.  This way, everything can be sorted.  Filling the tray tables took a bit of effort with 8 cars in progress.  Staining, preliminary "salting" (with some white paint diluted in alcohol), and rusting (paint in alcohol, not really mixed).


The trucks and under bodies are airbrushed--the rest is poorly mixed paint and stain.  So far cars 312 and 314 are about 90% complete.  I have a little more detailing to do on them, and some final painting, but I need to get the other six up to standard first.


Making these cars has been an interesting adjustment.  Size wise, a 24' car in ON30 is the length of a standard gauge freight car in HO (at least one in US outline).  I found myself looking at slim gauge cars repeatedly in order to get some sense of proportion.  Getting them on the rails, I am glad that I changed my coupler height to ON3 standard, lifting the car body somewhat.  Doing so really helped with the chunky proportion--something I like.


Sunday, October 14, 2012

Uncouple Anywhere 03

Nothing big to post this weekend, just in the throws of production on the Salt Wagons.  Keeping the decoders attached for the moment, since everything is coordinated.  I did spend more time than I should installing queen posts, truss rods, and turnbuckles--just had to make the wire discontinuous.  A bit odd, since the underframes are so stripped down--but the thought is that I might jam a board through a couple of the turnbuckles as was sometimes done, and it would be cool to see daylight through them.


Primed the trucks and the under-frames, painted the wheels. . . . after making a wheel jig.
Production is not exciting, but one foot in front of the other, I'm inching towards the fun part. . . Rust red primer is a little fun, but the most fun was adding some tone to the wheels.


The rest of the detail parts will arrive this week, and I am looking forward to painting and assembling next. . . . that will be fun.  We'll get there, I just underestimated the repetitive work of building 8 wagons at once.  Not the first time I've done that.